Thursday, October 20, 2011

Happy Turkey

The Holidays are approaching and what a fun gift to give.... (even if you give it to yourself)
For the instructions click:
 Happy Turkey
http://sewfunwiththesecretcloset.blogspot.com/2010/11/happy-turkey-is-finally-here.html

Wednesday, October 19, 2011

Quilt Batting Information


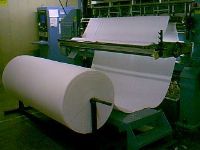
96" QUILT BATTING 6.6OZ FOLDEDI found some good information about batting and thought that I would pass this great information onto you all.  It is important to well educated yourself if you want to be successful in creating the best quilt for you and your loved ones. 


Batting 101
Whether you are just getting started with your first quilt, or are an experienced quilter with dozens or even hundreds of quilts under your belt it is important to understand the role that your batting will play in your finished quilt. The type of batting you choose can and will affect the final look of your quilt even over the thread, fabric and the final quilting. It is the second most important element in a quilt—and it isn’t even seen!


I have been in the quilting business for the past 20+ years I have seen a large variety of  quilting batts and I can definitely say that no two quilt batts that seem to be the same.  From the makers to the densities they are all unique.

Poly-Fil Cotton Classic bonded organic cotton quilt batting (90" x 20 yds) RollThere are a many thing to consider when selecting a batt for your quilt top.

First things to consider are:
  • What is the look you are wanting to achieve "puffy," "flat" or in between?
  • What feel do you want- stiff for a wall hanging, or soft for a child?
  • Are you wanting to have something heavy and warm or something much lighter and cooler?
All of these questions are important to address.

Another question to ask is what is my budget and do I want something synthetic organic or something in between?

The most common battings are cotton and cotton/polyester blends. Other materials used as fillers(and tend to be a little higher in price) include sheep or alpaca wools, silk, hemp, bamboo, and bamboo/cotton blends.

Types of batting:

Cotton—Cotton is an all natural and breathable fiber that is most commonly found in quilts. It is soft, washable, and quilts easily unless it’s been needle-punched. It wears well with age and washing. On the down side, as a crop, conventionally grown cotton takes a lot of fertilizers, pesticides, and bleaches before it reaches the quilter.
Polyester quilt batting by the roll


Polyester—using polycarbon fibers as a batting fill allows you to have any number of loft thicknesses and sizes. It is lightweight, warm, non-allergenic, doesn’t shrink, and is completely machine washable. On the other hand it doesn’t breath as well as natural fibers and has a greater tendency to beard. It is also a synthetic petroleum based product and not a renewable source. 


Airtex Quilt Batting by the RollCotton/polyester blends—blending the two materials ads loft to the batt while still maintaining some of the good qualities of the cotton including its breathability and softness. Both polyester and conventionally grown cotton are fairly eco-unfriendly products.


Heirloom 100% Wool Batting
Wool—Wool batting is lightweight, warm, breathable, and naturally flame resistant. It quilts really well because of the natural lanolin in the fibers, and is a good choice for heirloom quilts. However, it needs careful washing and drying to keep from shrinking, can cause allergic reactions, and must be protected from moths and other insects. It also tends to be more expensive than other types of batts.

MODA KYOTO BAMBOO COTTON QUILT BATTING  QUEEN SIZE


Bamboo—Bamboo and bamboo blend batting is fairly new on the market and is growing in popularity. Bamboo is a highly sustainable plant that needs no chemical fertilizers or pesticides to grow, it is breathable like cotton, has minimal shrinkage, contains no bleaches, glues, or binders, and is naturally antibacterial. It is bit more expensive than cotton but is proving to be a good choice for heirloom quilts. 


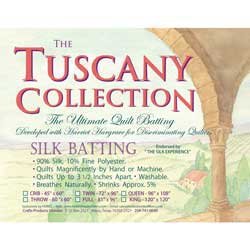
Silk—Silk batting is lightweight and thin yet still warm and breathable with a beautiful drape. It is a good choice for quilted clothing. However it must be washed carefully as it shrinks a good deal and it is also quite expensive.


Another thing you should be aware of is the way a batt is made:
There are two main methods of creating a batt:
Bonded batting: fibers are generally combed into a web and then chemically glued together with a bonding agent or resin. Some polyester battings are actually lightly melted together to form the batt.
Needle-punched batting: fibers are knitted together using a needle punched through the fibers. The needle used in this process is actually thousands of needles that push fibers into a consistent stable batt using scrim. Scrim is a very thin, transparent, non-woven fabric that is needled into batting. It reduces fiber migration and controls stretching to create a very stable batt.


Bonded batting vs. Needle-punched Batting

Commercially available battings are held together in one of two ways:
  • Bonded batting has the fibers bonded together by a glue-like bonding agent.
  • Needle-punched batting has the fibers mechanically felted together by punching them with lots and lots of needles. They are firmer and denser than bonded battings. Their density can also make them harder to hand quilt.
Other things to take into consideration include:
Drape: The stiffness of a batting or finished quilt. Higher quality battings can hold more stitches while still retaining their soft feel. Stiff cheaper battings will result in a harder stiffer quilt.
Bearding: How often batting fibers will push through your finished quilt. Poor quality battings will tend to pull apart after washing or extended use and migrate through the fabric of the quilt. This will result in little fuzzy balls appearing over the surface of your quilt over time. Good quality battings will minimize or eliminate this effect all together.
Loft: The thickness of the batt. Thicker battings will be harder to baste and quilt, while giving a puffy look to the over all quilt. Thinner battings will hold tighter smaller quilting designs, but won’t be as warm. If you have a specific thickness of quilt you are looking for it is a good idea to choose the fiber type that will work best with your loft preferences.
Breathability: How well the quilt will regulate heat and cold. Thicker more dense fibers will tend to keep the heat in and be warmer as a blanket. Natural fibers tend to allow for temperature regulation a little better than synthetics.

The right batting will make or break a quilt, just as the wrong batting could ruin countless hours of time spent on your latest quilt creation.  

Quick Tips:    PIECING BATTINGS:  Battings come in various sizes, but sometimes you need a larger size than is available in a particular brand.  This is when you need to splice two batts together to get the needed size.  The quickest (and easiest) way to do this is to butt (not overlap) two even straight edges together and whip-stitch the seam.  Do not pull tight the stitches as this will create a ridge in the batting.  

Piecing the batting is a good way to use up leftover strips of batting from previous projects.  However, I generally do not piece battings for bed quilts (when possible) and limit the practice to wallhangings as they will not get the wear that a bed quilt would receive over the years.

Fun Projects

In my "wanderings" I have been able to come upon a few fun projects and thought i would link you over- click on these great projects.  Thanks for stopping!!

The following are FREE patterns that were posted by a company by the name of "David Textiles Inc."
HAPPY QUILTING!!


Flowers
Regency
Floral Medallions
Peace
Cuddle Me
Butterflies and Flowers
Patriotic
Summer Fun
Neutral Bliss
Fall Leaves
Harvest Leaves
Native Hues
Birds and Holly
Lady Rose
Memories

Fleece Care


Tips For Caring For Fleece

  • Fleece DOESN’T shrink so there is no need to pre-treat fleece, you can start your new fleece project immediately!
  • Wash fleece in lukewarm water avoiding bleach and fabric softener. For drying, use low heat for a short time.
  • Pressing fleece is NOT recommended. While constructing your project, if pressing becomes necessary, hold iron above fleece and steam, using fingers, to press seam flat. Direct contact with iron may create a permanent imprint on fleece.

Tips For Finding The "Right Side" Of Fleece

  • Before starting a project, determine the right side of the fleece fabric, pull on the cut edges of the fabric in both directions, fleece will stretch more on the cross grain. Once you have determined the edge with the most stretch, continue to pull gently, the fleece will curl to the wrong side.

Tips For A No Sew Fleece Blanket

  • The main fleece piece and contrast fleece piece should have opposite directions of stretch, to make fringe easier to tie.
  • Fringe for ties should be 1" wide by 3" long for best result.
  • Cut fringe for main fleece and contrast fleece together so you have matching fringe to tie. The preferable method used to cut fringe is with a rotary cutter.

Tips For Finishing Fleece

  • Fleece is a non-fraying fabric, (the raw edges do not need to be finished). There are many ways to decoratively finish a fleece fabric: binding, hemming, fringe, beaded fringe, appliqué, blanket stitch, embroidery, quilting or using decorative rotary blades to create an edge shape. The ways of finishing a fleece project or garment is only limited by your imagination.

Sunday, July 17, 2011

Crazy Quilt Bag

Crazy Quilt Bag
Created by: Maddie Bushman
Level: Intermediate
The Crazy Quilt Bag is perfect for those weekend getaways. It is large enough to hold all those necessary items for a wonderful three-day vacation. Yet, it is lightweight, washable and easy to store. This is a fun project for the serger enthusiast. You will be delighted at how easy this type of crazy quilting can be done on the serger.

I really thought this bag was very cute- I love Love LOVE bags, just look at my closet and you'll see.  I really liked the size and shape it is.  This is why I thought I would pass it along.  how cute would it be to "rag" this one!!  I am also going to be putting up a EASY version of a "Rag-Bag" one that you and your little sewers can sew together.  As soon as I get it "tuted"(made into a tutorial) I will link it here.


I'll be honest- I am a big Bernina fan and I highly recommend this brand- however- I am not promoting one or another brand of sewing machine.  Besides, I bet there are those of you out there that are stuck on some other brand.  I think what you learn on is what you love- So although this is a pattern from a "Janome" sight- I am not necessarily promoting the Janome brand... just saying.


Just click on the title of this posting and it will take you to the instructions.


Happy Sewing!


    Wednesday, May 11, 2011

    DaLene's Quilts

    Thought I would share my latest custom quilting design.
    She will be binding it.
    Thank you I hope it brings your family fun memories of movie watching and snuggling!
    Top 
    Feathered Circle
    Back
    Top

    Back


    Tuesday, May 10, 2011

    Have holes in your jeans?   Give those old jeans some new life with just a bit of sewing.
    Materials:
    • Ripped Jeans
    • Iron-on Patches
    • Cookie Cutter
    • Sharpie
    • Scrap of fabric
    • Wonder Under
    • Sewing supplies
        
    Instructions:
    1. I traced around the butterfly on the back side of my patch using a Sharpie. This may shock a few of you, but I tried pencil, and a Mark B Gone pen and they just didn’t show up. The Sharpie worked great, I was just careful to cut inside the line of black. You could use a white fabric marking pencil, but I couldn’t find mine. -Do what you can with what you have, I guess.


    2. I also cut out a flower for a different pair. This one I embellished with another fabric too.


    3. I had a scrap of fabric with a perfect flower.


    4. I used a small bit of Wonder Under on the back side of my chosen flower. Iron it on.


    5. Then cut around the flower. The Wonder Under isn’t strictly necessary for a piece this small. It’s peace of mind that it won’t fall off. Peel off the paper backing…


    6. DON’T try to iron it onto your patch yet! Your patch will get sticky on the back, and be stuck to your ironing board. (No, I didn’t do that… but I wouldn’t put it past me.)


    7. Stitch your embellishment onto your cut patch using a blanket stitch or a zigzag.


    8. Now you can iron the whole thing over the hole in your jeans.


    9. I rolled the jeans up, to make the sewing easier.  I used a heavier weight- DMC thread, a heavy needle…


    10. ...and a thimble to stitch around the flower. I kept my needle working from the top as shown. It’s a little tough to sew through the denims, but not too bad.

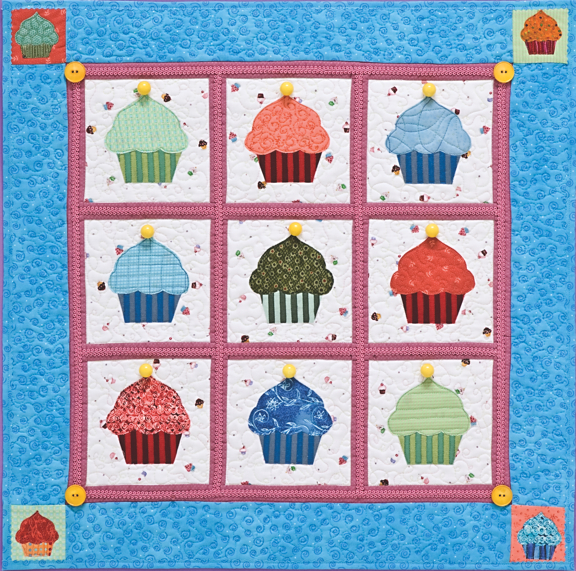
    Cup Cake Quilt

    Cupcakes Quilt
    Indulge your sweet tooth with this colorful cupcake quilt. 
    This project is an excerpt from C&T Publishing Cupcakes! 
    by Lynn Koolish which includes 29 other yummy projects for sewers, quilters, knitters, and bakers!!


    Materials:
    • Block background fabric: 9 squares 6˝ × 6˝ (½ yard)
    • Scraps for cupcake appliqués
    • Border corner blocks: 4 scraps 3˝ × 3˝
    • Sashing fabric: 6 strips 1¼˝ × 6˝, 4 strips 1¼˝ × 18½˝, and 2 strips 1¼˝ × 20˝ (1/4 yard)
    • Border fabric: 4 strips 3˝ × 20˝ for borders, additional strips for binding (¼ yard)
    • Backing fabric: 26˝ × 26˝ (¾ yard)
    • Batting: 26˝ × 26˝
    • Decorative trim: 4½ yards (optional)
    • Buttons
    • Paper-backed fusible web, 17˝ wide: ½ yard
       
    Instructions:
    Note: Seam allowances are 1/4˝.
    1. Iron paper-backed fusible web to the wrong side of the fabric scraps for the cupcake appliqués. Remove the paper backing.
       
    2. Click here to download the cupcake patterns. Use the patterns to cut out the top and bottom pieces for 9 cupcakes.

      Cupcakes Quilt Close
       
    3. Reduce the cupcake pattern 50%, and cut out pieces for 4 mini cupcakes for the corner blocks.
       
    4. Create 9 blocks by fusing the cupcake pieces to the block backgrounds.
       
    5. Sew the 11/4˝ × 6˝ sashing pieces between the blocks to create 3 rows. Press.
       
    6. Sew the rows together with the 11/4˝ × 181/2˝ sashing strips. Press.
       
    7. Sew a 11/4˝ × 181/2˝ strip on each side. Press.
       
    8. Sew the 11/4 ˝ × 20˝ sashing strips on the top and bottom. Press.
       
    9. Sew border strips to the top and bottom. Press.
       
    10. Fuse the mini cupcakes to the corner blocks. Sew the corner blocks to each end of the remaining border strips. Press.
       
    11. Sew the remaining border strips to the sides. Press.
       
    12. Layer the backing, batting, and quilt top. Baste.
       
    13. Quilt and bind. Embellish with trim and buttons.

       
    Diagram

    Sunday, February 27, 2011

    Playing Catch-up with this Roman Stripe Quilt block

    I have been so busy with sick kids, husband and even I got it bad enough to put me out of commission for a while- but I was still quilting- just not well enough to post anything- So I guess that it is about time huh??


    This is a beautiful quilt that was a joy to quilt.  The pieced work was done by Nancy Arehart.  The colors are what I think are great.  This quilt keeps the traditional "black" in as the grounding color- but adds a very vibrant "spunky" flare of fresh bright jewel tone colors.  This pattern inspired me to look a little deeper into why this block received this specific name.  I couldn't find much out about the specific design- for instance why it was named this "the Roman Stripe" but I did find out some other interesting things.


    Early block designs allowed quilters to use very small scraps of fabric- as to save and reuse all fabric that was saved.  Some of the earliest blocks were made up of 4 squares of fabric sewn together (4-patch) or 9 squares of fabric sewn together (9-patch) in many different variations.  One of the earliest 9-patch blocks was the Roman Square, also known as the Roman Stripe.  Although the directional design of the quilt blocks may vary, they all relate and may have derived from the roman square.  


    I always think that the names for the quilt blocks are interesting.   They can reflect the historical time period of the United States, or the names can reflect something that was a strong influence to the quilters of the past.   For some blocks biblical influence is apparent, such as Jacob's Ladder or Job's Trouble.  The hardship of the pioneers can be seen from blocks with names such as the Rocky Road to California or the wagon wheel.  Or simply the quilt blocks were named from everyday life, with names like Churn Dash and Log Cabin.

    Many quilt block patterns have several different names.  One quilt block pattern in the eastern side of the states is most likely to have a different name when in the Midwest or far-West.  Sometimes old names were changed for commercial purposes.  It is wonderful to learn about the history of quilt making because each generation of quilters will add its own variations to an old art form.


    Monday, February 14, 2011

    Sharing Valentine Wall Quilts

    Valentine's Day 
    Wall Quilt
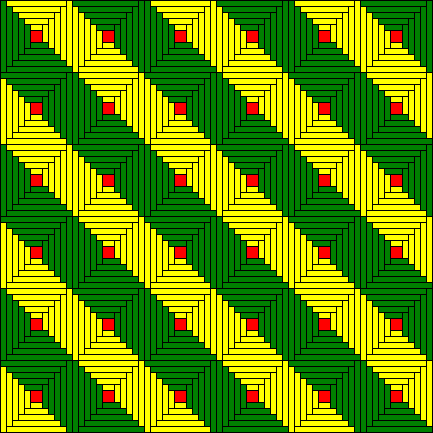
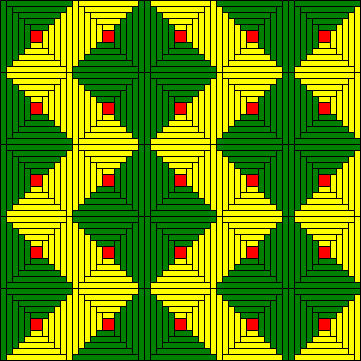
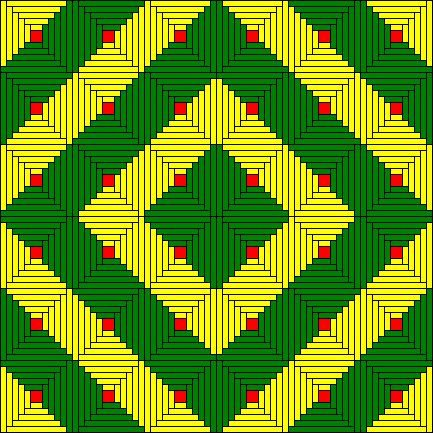
    Log cabin design


    I love Valentine's Day and love creating fun projects.  
    When I saw this cute wall quilt, I couldn't stop thinking about how fun it was.

    I asked the creator, Nancy Arehart,  if I could share it on this blog... 

    and she said YES!!

    She said that she saw this done once and decided to recreate it from memory... that's talent...

    So I though that I would try to help the rest of us all with the assembly.


    Fun Fabric detail too.

    notice the fun ribbon embellishment in the center.


     The Log Cabin Assemble design:
    I found a great explanation here at:
    http://quilt.com/Blocks/LogCabin/LogCabin.html
    but more great assembly instructions are here at this site too.  I have visited there many times.
    I simply re-posted it here -I have modified it a bit but for the most part its the same.

    You will need:
    8 red/white Log Cabin blocks
    2 red Logs Cabin Blocks
    2 white Log Cabin Blocks

    The Border can be any width - a 3 inch boarder would be nice- you will need to cut it out to measure 3 1/2 inches wide to allow for the seam allowance.

    You may like to add 2 boarders like in this creation.

    Batting you might like to use will be a warm and natural or maybe a polyester - no more than 1/4 in thick.

    You can use this for a Table Quilt or a Wall hanging.

    HAPPY VALENTINE'S DAY and GET CREATIVE!!


    Fabric
    The Log Cabin block uses three different fabrics. Traditionally, the center square was red fabric symbolizing the hearth, or the fireplace- which was a representation of the warmth (heart) of the home.

    But you can use any and all colors- your design is only limited to your imagination.

      Fabric A
      Fabric B
      Fabric C

     Cutting the fabric

    Note: The requirements given below are for those who wish to cut all of the "logs" before joining them to the block. This block requires:

     one 2-1/2" square of Fabric A
     1-1/2" x 2-1/2" rectangle of Fabric B
       1-1/2" x 3-1/2" rectangle of both Fabric B and Fabric C
       1-1/2" x 4-1/2" rectangle of both Fabric B and Fabric C
       1-1/2" x 5-1/2" rectangle of both Fabric B and Fabric C
       1-1/2" x 6-1/2" rectangle of both Fabric B and Fabric C
       1-1/2" x 7-1/2" rectangle of both Fabric B and Fabric C
       1-1/2" x 8-1/2" rectangle of both Fabric B and Fabric C


      Piecing the block

    The Log Cabin block begins with a center fabric square which is surrounded by "logs". The logs are joined to the block in a circular fashion starting with shorter logs and working out to the longer ones. The logs are joined in a circular fashion with the block being rotated 90° counter-clockwise after each log is joined. The current log being joined is always started on the log which was just joined to the block.Pressing Note: The seam allowances in this block are always pressed toward the rectangle which has just been joined to the block.

     1) Join the 2-1/2" square of Fabric A to the 1-1/2" x 2-1/2" rectangle of Fabric B.
     2) Turn the block 90° counter-clockwise and join the 1-1/2" x 3-1/2" of Fabric B.
     3) Turn the block 90° counter-clockwise and join the 1-1/2" x 3-1/2" of Fabric C.
     4) Turn the block 90° counter-clockwise and join the 1-1/2" x 4-1/2" of Fabric C.
     5) Turn the block 90° counter-clockwise and join the 1-1/2" x 4-1/2" of Fabric B.
     6) Turn the block 90° counter-clockwise and join the 1-1/2" x 5-1/2" of Fabric B.
     7) Turn the block 90° counter-clockwise and join the 1-1/2" x 5-1/2" of Fabric C.
     8) Turn the block 90° counter-clockwise and join the 1-1/2" x 6-1/2" of Fabric C.
     9) Turn the block 90° counter-clockwise and join the 1-1/2" x 6-1/2" of Fabric B.
     10) Turn the block 90° counter-clockwise and join the 1-1/2" x 7-1/2" of Fabric B.
     11) Turn the block 90° counter-clockwise and join the 1-1/2" x 7-1/2" of Fabric C.
     12) Turn the block 90° counter-clockwise and join the 1-1/2" x 8-1/2" of Fabric C.


    You may want to stop here and assemble your wall quilt- but to further the block , (make it larger) continue till you have reached your wanted size.

    Other designs can be created as well-

    to see other designs you may like to Click one of the following:

    LogCabin- Furrows

    Sunshine and Shadows

    Barn raising


    This method is also used and I actually like it best- It takes out all the pre-cutting.


     1) If making more than one Log Cabin block, it is quicker to cut the fabric strips after sewing the strip to the block rather than cutting the strips before. Cut the center 2-1/2" square of Fabric A as shown above. Then cut several 1-1/2" strips of Fabric B and several 1-1/2" strips of Fabric C. (The amount needed depends upon the number of blocks begin made. Start the block by joining the 2-1/2" squares of Fabric A to one of the 1-1/2" strips of Fabric B in a continuous line leaving a small space between each of the Fabric A Squares. Press the seam allowance toward the 1-1/2" strip.
     2) With the rotary cutter, carefully cut the Step 1 strip apart being sure that the cut is made straight along the side of the Fabric A square. In other words, make sure that the block stays square. Now, take these units, and piece them to the 1-1/2" strip of Fabric B, leaving a small space between each unit and being sure that the most recently pieced part of the block being the first part to be joined. Press the seam allowance toward the just added strip.
     Cut the Step 2 units apart as described above. Continue to add new strips, as described in Step 2, to the block, making sure that the strips are alternated between Fabric B and Fabric C every two "logs". After adding the new strip, press the seam allowance toward the most recently joined strip and making sure to cut the blocks even. Continue until the desired size is reached.


    Piecing a Single Block

    While the above technique shows several Log Cabin blocks being pieced at one time, the technique can be used to piece single blocks as well. Simple, sew the block to the correct 1-1/2" fabric strip and cut the strip to the correct length after the strip is joined.

    HAPPY QUILTING!