Valentine's Day
Wall Quilt
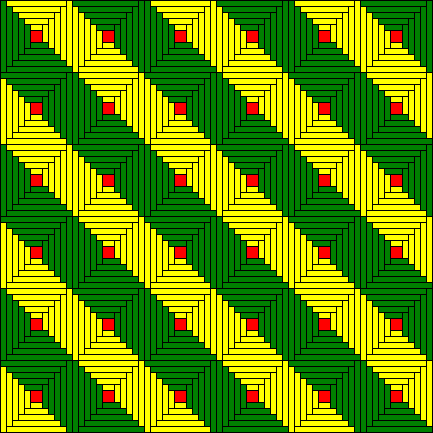
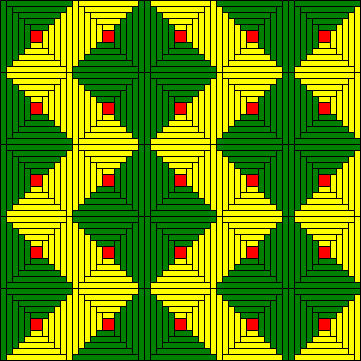
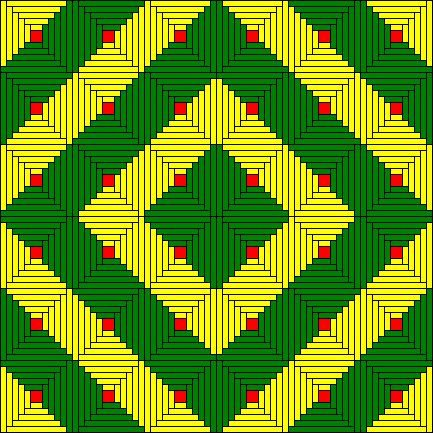
Log cabin design
I love Valentine's Day and love creating fun projects.
When I saw this cute wall quilt, I couldn't stop thinking about how fun it was.
I asked the creator, Nancy Arehart, if I could share it on this blog...
and she said YES!!
She said that she saw this done once and decided to recreate it from memory... that's talent...
So I though that I would try to help the rest of us all with the assembly.
 |
| Fun Fabric detail too. |
 |
| notice the fun ribbon embellishment in the center. |
The Log Cabin Assemble design:
I found a great explanation here at:
http://quilt.com/Blocks/LogCabin/LogCabin.html
but more great assembly instructions are here at this site too. I have visited there many times.
I simply re-posted it here -I have modified it a bit but for the most part its the same.
You will need:
8 red/white Log Cabin blocks
2 red Logs Cabin Blocks
2 white Log Cabin Blocks
The Border can be any width - a 3 inch boarder would be nice- you will need to cut it out to measure 3 1/2 inches wide to allow for the seam allowance.
You may like to add 2 boarders like in this creation.
Batting you might like to use will be a warm and natural or maybe a polyester - no more than 1/4 in thick.
You can use this for a Table Quilt or a Wall hanging.
HAPPY VALENTINE'S DAY and GET CREATIVE!!
Fabric
The Log Cabin block uses three different fabrics. Traditionally, the center square was red fabric symbolizing the hearth, or the fireplace- which was a representation of the warmth (heart) of the home.
But you can use any and all colors- your design is only limited to your imagination.

Fabric A

Fabric B

Fabric C
Cutting the fabric
Note: The requirements given below are for those who wish to cut all of the "logs" before joining them to the block. This block requires:
 | one 2-1/2" square of Fabric A |
 | 1-1/2" x 2-1/2" rectangle of Fabric B |
  | 1-1/2" x 3-1/2" rectangle of both Fabric B and Fabric C |
  | 1-1/2" x 4-1/2" rectangle of both Fabric B and Fabric C |
  | 1-1/2" x 5-1/2" rectangle of both Fabric B and Fabric C |
  | 1-1/2" x 6-1/2" rectangle of both Fabric B and Fabric C |
  | 1-1/2" x 7-1/2" rectangle of both Fabric B and Fabric C |
  | 1-1/2" x 8-1/2" rectangle of both Fabric B and Fabric C |
|
|
 Piecing the block
The Log Cabin block begins with a center fabric square which is surrounded by "logs". The logs are joined to the block in a circular fashion starting with shorter logs and working out to the longer ones. The logs are joined in a circular fashion with the block being rotated 90° counter-clockwise after each log is joined. The current log being joined is always started on the log which was just joined to the block.
Pressing Note: The seam allowances in this block are always pressed toward the rectangle which has just been joined to the block.
 | 1) Join the 2-1/2" square of Fabric A to the 1-1/2" x 2-1/2" rectangle of Fabric B. |
 | 2) Turn the block 90° counter-clockwise and join the 1-1/2" x 3-1/2" of Fabric B. |
 | 3) Turn the block 90° counter-clockwise and join the 1-1/2" x 3-1/2" of Fabric C. |
 | 4) Turn the block 90° counter-clockwise and join the 1-1/2" x 4-1/2" of Fabric C. |
 | 5) Turn the block 90° counter-clockwise and join the 1-1/2" x 4-1/2" of Fabric B. |
 | 6) Turn the block 90° counter-clockwise and join the 1-1/2" x 5-1/2" of Fabric B. |
 | 7) Turn the block 90° counter-clockwise and join the 1-1/2" x 5-1/2" of Fabric C. |
 | 8) Turn the block 90° counter-clockwise and join the 1-1/2" x 6-1/2" of Fabric C. |
 | 9) Turn the block 90° counter-clockwise and join the 1-1/2" x 6-1/2" of Fabric B. |
 | 10) Turn the block 90° counter-clockwise and join the 1-1/2" x 7-1/2" of Fabric B. |
 | 11) Turn the block 90° counter-clockwise and join the 1-1/2" x 7-1/2" of Fabric C. |
 | 12) Turn the block 90° counter-clockwise and join the 1-1/2" x 8-1/2" of Fabric C. |
|
|
You may want to stop here and assemble your wall quilt- but to further the block , (make it larger) continue till you have reached your wanted size.
Other designs can be created as well-
to see other designs you may like to Click one of the following:
LogCabin- Furrows
Sunshine and Shadows
Barn raising
This method is also used and I actually like it best- It takes out all the pre-cutting.
 | 1) If making more than one Log Cabin block, it is quicker to cut the fabric strips after sewing the strip to the block rather than cutting the strips before. Cut the center 2-1/2" square of Fabric A as shown above. Then cut several 1-1/2" strips of Fabric B and several 1-1/2" strips of Fabric C. (The amount needed depends upon the number of blocks begin made. Start the block by joining the 2-1/2" squares of Fabric A to one of the 1-1/2" strips of Fabric B in a continuous line leaving a small space between each of the Fabric A Squares. Press the seam allowance toward the 1-1/2" strip. |
 | 2) With the rotary cutter, carefully cut the Step 1 strip apart being sure that the cut is made straight along the side of the Fabric A square. In other words, make sure that the block stays square. Now, take these units, and piece them to the 1-1/2" strip of Fabric B, leaving a small space between each unit and being sure that the most recently pieced part of the block being the first part to be joined. Press the seam allowance toward the just added strip. |
 | Cut the Step 2 units apart as described above. Continue to add new strips, as described in Step 2, to the block, making sure that the strips are alternated between Fabric B and Fabric C every two "logs". After adding the new strip, press the seam allowance toward the most recently joined strip and making sure to cut the blocks even. Continue until the desired size is reached. |
Piecing a Single Block
While the above technique shows several Log Cabin blocks being pieced at one time, the technique can be used to piece single blocks as well. Simple, sew the block to the correct 1-1/2" fabric strip and cut the strip to the correct length after the strip is joined.
HAPPY QUILTING!

 I have been so busy with sick kids, husband and even I got it bad enough to put me out of commission for a while- but I was still quilting- just not well enough to post anything- So I guess that it is about time huh??